

In this comprehensive guide, we will delve into the intricacies of disabling auto updates on your Windows 10 PC in 2023. We understand that sometimes automatic updates can be frustrating, and it’s important to have the option to control when and how your system updates. Let’s explore the various methods to ensure your Windows 10 machine doesn’t update without your consent, while maintaining the security and functionality of your PC.
Table of Contents
- Introduction
- The importance of controlling Windows 10 updates.
- The potential downsides of auto updates.
- Why You Should Consider Turning Off Auto Updates
- Balancing security and convenience.
- Data usage concerns.
- Timing updates for your convenience.
- Method 1: Using Windows Update Settings
- Step-by-step instructions for disabling auto updates through Windows Update settings.
- Configuring active hours to control update installation.
- Method 2: Utilizing Group Policy
- Using the Local Group Policy Editor to disable auto updates.
- Configuring specific policies for more advanced control.
- Method 3: Metered Connection Trick
- Leveraging the metered connection setting to restrict automatic updates.
- Its limitations and potential impact on security updates.
- Method 4: Setting Up a Specific Wi-Fi Network as Metered
- A workaround to control updates by designating a specific network as metered.
- Monitoring your network usage to avoid unexpected updates.
- Method 5: Using Windows Update Blocker Tools
- Overview of third-party tools to block Windows updates.
- The potential risks and advantages of this approach.
- Method 6: Disabling Windows Update Service
- A more advanced method to stop auto updates by disabling the Windows Update service.
- Potential consequences and the need for manual updates.
- Reversing the Changes: Enabling Auto Updates
- How to revert to automatic updates when needed.
- Ensuring your system’s security.
- FAQs (Frequently Asked Questions)
- Common concerns about turning off auto updates.
- Detailed answers to address your queries.
- Conclusion
- A summary of the methods discussed.
- The importance of balancing control and system security.
Introduction
Auto updates in Windows 10 are designed to keep your system secure and up-to-date with the latest features. While this is beneficial for most users, some prefer to have more control over when updates are installed. In this article, we will explore the various methods to disable automatic updates, allowing you to manage your PC more effectively.
Why You Should Consider Turning Off Auto Updates
Before we delve into the methods, let’s discuss why you might want to disable auto updates.
Balancing Security and Convenience
Windows updates often include security patches that protect your system from vulnerabilities. However, not all updates are time-sensitive. By disabling auto updates, you can choose when to install them, ensuring they don’t disrupt your work or leisure.
Data Usage Concerns
Automatic updates can consume a significant amount of data. This is especially important if you have limited bandwidth or pay for data usage. Disabling auto updates allows you to control when your system downloads and installs these updates.
Timing Updates for Your Convenience
Sometimes, updates can occur at the most inconvenient times, causing your PC to restart when you least expect it. By turning off auto updates, you can schedule updates during periods of low activity or when it’s most convenient for you.
Method 1: Using Windows Update Settings
Step 1: Accessing Windows Update Settings
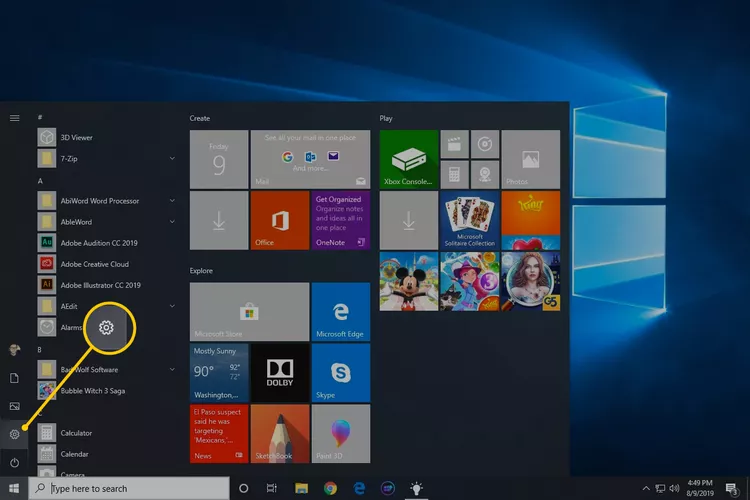
- Click on the “Start” button in the lower-left corner of your screen.
- Select “Settings” (the gear-shaped icon).
- In the Settings window, click on “Update & Security.”


Step 2: Configuring Windows Update Settings
- In the Update & Security window, select “Windows Update” from the left sidebar.
- Click on “Advanced options.”
- Under “Pause updates,” you can select a specific date to pause updates for up to 35 days.
By following these steps, you can temporarily halt automatic updates. However, it’s important to note that this method does not entirely disable updates but allows you to delay them.


Configuring Active Hours
- Under “Windows Update,” select “Change active hours.”
- Set the times when you are actively using your computer. Windows will not install updates during these hours.
This method provides some control over updates without completely turning them off. It’s a suitable option if you want to manage updates without disabling them entirely.


Method 2: Utilizing Group Policy
The Local Group Policy Editor is a powerful tool for managing various aspects of your Windows system, including updates. Here’s how to use it to disable auto updates.
Step 1: Open the Local Group Policy Editor
- Press the “Windows” key and “R” simultaneously to open the Run dialog box.
- Type “gpedit.msc” and press “Enter.”
Step 2: Navigate to Windows Update Policies
- In the Local Group Policy Editor, navigate to “Computer Configuration” > “Administrative Templates” > “Windows Components” > “Windows Update.”
Step 3: Disable Windows Updates
- Locate “Configure Automatic Updates” on the right panel.
- Double-click on “Configure Automatic Updates” to open its properties.
- Select “Disabled” to turn off automatic updates.
- Click “Apply” and then “OK.”
This method provides a more comprehensive way to disable auto updates by modifying group policies. It is suitable for users who want more control over the update process.
Method 3: Metered Connection Trick
A metered connection is typically used for mobile data connections, but you can also use it for Wi-Fi networks. When your network is set as metered, Windows will restrict background data usage, including automatic updates.
Step 1: Set Your Wi-Fi Network as Metered
- Click on the “Start” button and then select “Settings.”
- In the Settings window, choose “Network & Internet.”
- Click on “Wi-Fi” from the left sidebar.
- Under “Manage known networks,” select your Wi-Fi network.
- Toggle on the switch that says, “Set as metered connection.”
This method is especially useful for those who have limited data plans and want to minimize data consumption by Windows updates.
Method 4: Setting Up a Specific Wi-Fi Network as Metered
The previous method sets your current Wi-Fi network as metered. However, you can also set up a new network as metered. This is particularly helpful if you have multiple Wi-Fi networks and want to control updates on specific ones.
Step 1: Set Up a New Wi-Fi Network as Metered
- Follow the same steps as in “Method 3” to open the Wi-Fi settings.
- Under “Manage known networks,” click on “Add a new network.”
- Enter the network name and security settings.
- Toggle on the switch that says, “Set as metered connection.”
This method allows you to be more selective in controlling which networks restrict updates, offering flexibility in managing your updates.
Method 5: Using Windows Update Blocker Tools
If you prefer a more straightforward approach
, various third-party tools are available to block Windows updates. However, be cautious when using these tools, as they can have drawbacks.
Overview of Windows Update Blocker Tools
Windows Update blocker tools are software applications designed to disable or block Windows updates. They are user-friendly and do not require in-depth technical knowledge to use.
Advantages of Windows Update Blocker Tools
- Easy to use, suitable for beginners.
- Quick and efficient way to disable updates.
- Some tools provide options to enable or disable updates with a single click.
Risks and Disadvantages
- Security concerns: Blocking updates may leave your system vulnerable to new threats.
- Compatibility issues: These tools may not work with the latest Windows updates, causing problems.
- Not officially supported: Windows does not endorse or support third-party update blockers.
When using Windows Update blocker tools, be aware of the potential risks and weigh the advantages against the disadvantages. It’s essential to monitor your system’s security and consider manually installing important updates.
Method 6: Disabling Windows Update Service
This method is the most advanced and should be approached with caution. Disabling the Windows Update service effectively stops all automatic updates, including important security patches.
Step 1: Open the Services Application
- Press “Windows” + “R” to open the Run dialog.
- Type “services.msc” and press “Enter.”
Step 2: Locate Windows Update Service
- Scroll down to find “Windows Update” in the list of services.
- Double-click on “Windows Update” to open its properties.
Step 3: Disable the Service
- In the “Startup type” dropdown menu, select “Disabled.”
- Click “Apply” and then “OK.”
While this method gives you full control over updates, it is not recommended for most users. Disabling the Windows Update service can leave your system vulnerable to security threats.
Reversing the Changes: Enabling Auto Updates
If you ever decide to re-enable automatic updates, follow these steps to ensure your system remains secure.
- Open the method you used to disable updates (e.g., Windows Update Settings, Group Policy, or Windows Update service).
- Revert the settings to their default or enable automatic updates.
- Check for available updates and ensure your system is up-to-date.
FAQs (Frequently Asked Questions)
1. Is it safe to disable automatic updates?
Disabling automatic updates can be safe as long as you stay vigilant about manually updating your system to install critical security patches.
2. What is the difference between pausing updates and disabling them?
Pausing updates temporarily delays their installation, while disabling updates prevents them altogether until you re-enable them.
3. Can I choose which updates to install and which to skip?
Yes, you can select which updates to install and which to skip if you manually manage updates.
4. What are the risks of using third-party update blocker tools?
Third-party tools may lead to security vulnerabilities and compatibility issues with your system. Use them with caution.
5. How often should I manually check for updates if I disable automatic updates?
It’s advisable to check for updates at least once a week to ensure your system remains secure.
Conclusion
Turning off auto updates on your Windows 10 PC in 2023 can provide you with more control and flexibility. By following the methods outlined in this article, you can tailor your update schedule to better suit your needs while maintaining your system’s security. Whether you choose to pause, block, or manually manage updates, the key is to find a balance that works best for you. Be sure to stay informed about the potential security implications and regularly check for critical updates to keep your PC safe and up-to-date.